Clogged or slow-draining bathroom sinks can be a nuisance, leading to unpleasant odors and water backups. Fortunately, removing and cleaning the sink drain is a simple DIY task that can resolve these issues. This article provides a comprehensive, step-by-step guide on safely and effectively removing a bathroom sink drain for thorough cleaning and maintenance.
Recommended Equipment
Having the right tools can make the job much easier and more efficient. Here’s a list of recommended equipment you’ll need:
- Wrench or pliers (for loosening stubborn nuts)
- Flashlight (for better visibility under the sink)
- Scrub brush (for cleaning the drain pipe and sink stopper)
- Soap or cleaning product (for removing grime and buildup)
- Vinegar (a natural alternative to chemical cleaners)
- Bucket (to catch water and debris from the drain)
- Hair clog removal tool (a long plastic stick with a hook for pulling out hair and gunk)
- Plumber’s putty (for sealing new connections between the sink and drain)
Required Tools
While the list above covers most of the essential tools, it’s crucial to have everything ready before starting the project. This ensures a smoother process and prevents potential mishaps or delays. Take a few moments to gather and organize all the tools within easy reach.
What Are The Best Steps?
Removing and cleaning a bathroom sink drain may seem daunting, but following the proper sequence can make it a straightforward task. Here are the best steps to guide you through the process:
Step 1: Get Ready
Before diving in, clear the area under the sink and remove any stored items that might obstruct your workspace. Lay down a towel or protective covering to catch any spills or debris. Consider putting on gloves to keep your hands clean during the process.
Step 2: Turn Off Water
Turning off the water supply is crucial to prevent unwanted flooding or leaks. Locate the shut-off valves under the sink or behind the wall, and turn them clockwise to shut off the water flow.
Step 3: Take Apart the Pipes
Locate the drain pipe sections under the sink and begin disconnecting them. You may need to place a bucket underneath to catch any residual water or debris that falls out. Use a wrench or pliers if the connections are too tight.
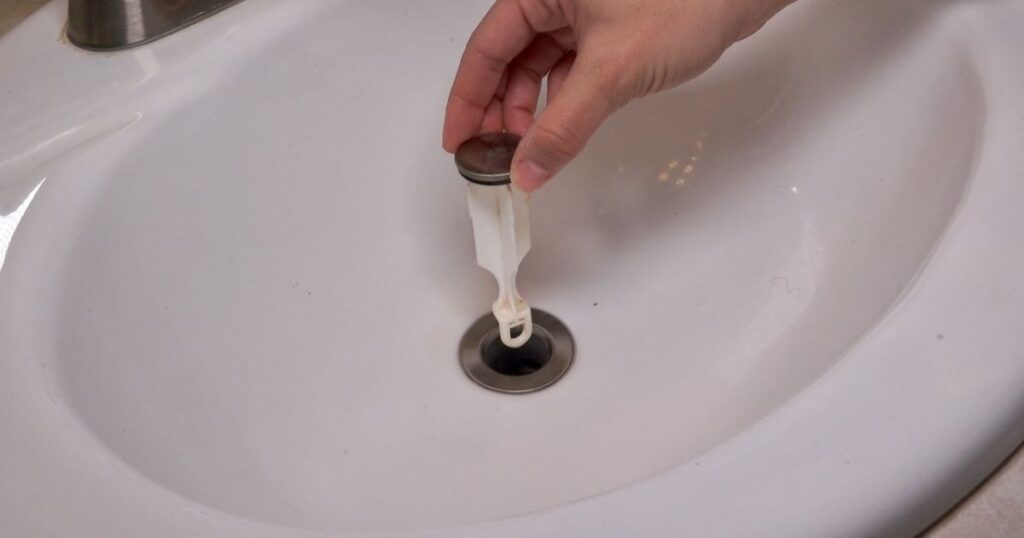
Step 4: Remove the Sink Stopper
Next, locate and remove the sink stopper mechanism. This usually involves identifying and removing a metal clip or rod that connects the stopper to the drain lever. Once detached, you can remove the stopper and set it aside for cleaning.
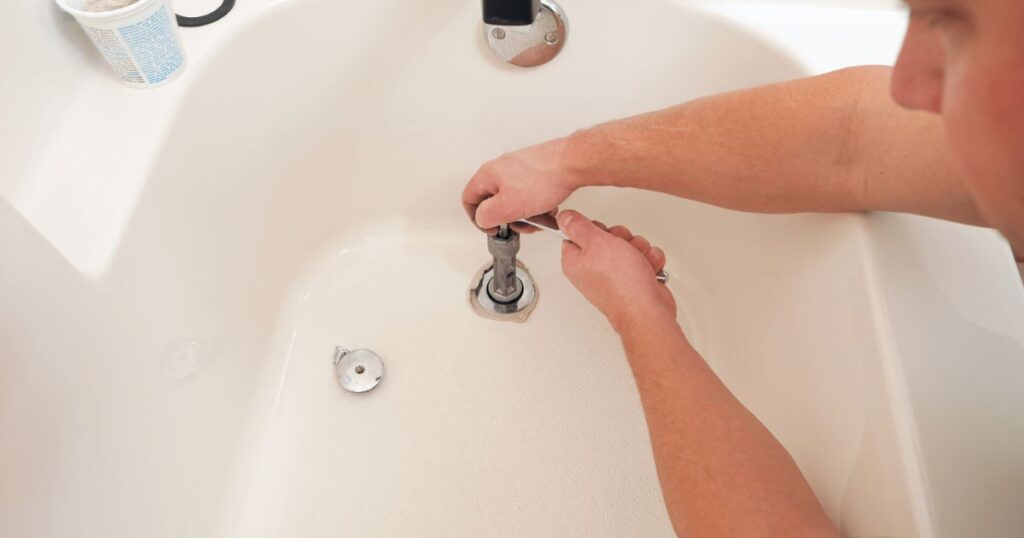
Step 5: Loosen the Drain Cover
Under the sink, you’ll find a drain cover or filter that sits over the central drain opening. Use pliers or a wrench to loosen and remove this cover, taking caution as water or debris may fall out.
Step 6: Take Off the Drain Cover
With the drain cover removed, you should have direct access to the main drain pipe. Carefully take off the cover, being prepared to catch any water or debris that may come out.
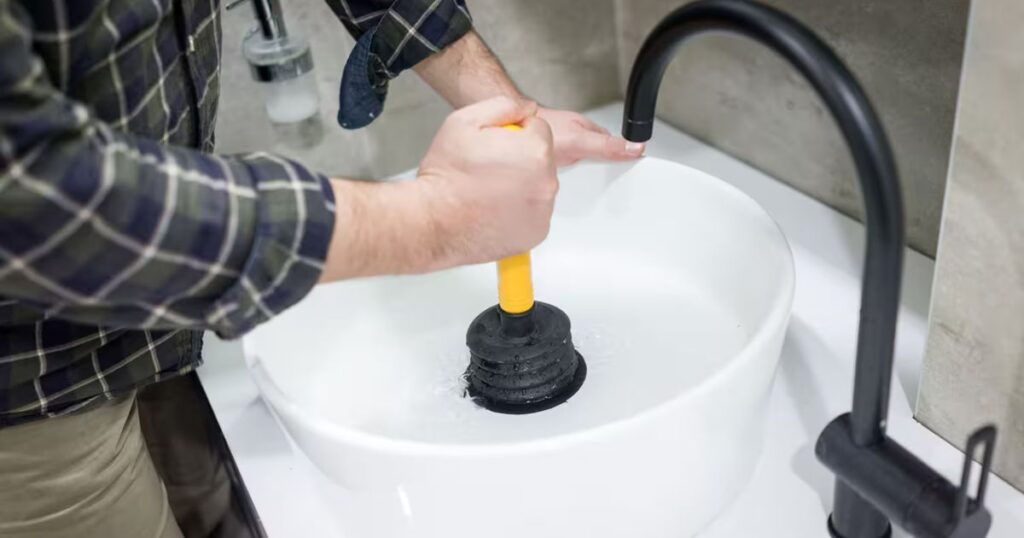
Step 7: Clean Up
This is where the natural cleaning begins. Using your hair clog removal tool, scrub brush, and cleaning solutions (soap, vinegar, or a commercial drain cleaner), thoroughly clear out any hair, gunk, or mineral buildup from the inside of the drain pipe. Work methodically, ensuring you dislodge and remove as much buildup as possible.
Safety Tip: Wear gloves and avoid splashing harsh chemicals in your eyes or skin.
Step 8: Put Things Back Together
Once the drain pipe is clean and clear, it’s time to reassemble everything in reverse order. Start by carefully replacing the drain cover, ensuring it’s properly aligned and secured. Then, reconnect the sink stopper mechanism, making sure it moves freely. Finally, reattach the drain pipe sections, tightening them securely with a wrench or pliers if needed.
How Much Does It Cost?
The cost of removing and cleaning a bathroom sink drain can vary depending on whether you do it yourself or hire a professional plumber. Here’s a breakdown of the costs:
DIY Approach:
- Tools and materials (if you don’t already have them): $20 – $50
- Your time and effort: Free
Total DIY Cost: $20 – $50
Hiring a Professional Plumber:
- Labor cost: $50 – $150 (depending on the plumber’s rates and the complexity of the job)
- Additional parts or materials (if needed): $10 – $50
Total Professional Cost: $60 – $200
As you can see, tackling this project can save you significant money, especially if you already have some essential tools.
Other Recommended Maintenance
While you’re already working on the bathroom sink, take the opportunity to inspect and address a few other potential maintenance issues:
- Skylight Cleaning: If you have a skylight in the bathroom, check if it’s dirty and clean it using rags, soap, water, and a telescoping pole.
- Pipe Leak Repair: If you notice any leaks in the pipes under the sink, use an epoxy putty and a patch or clamp to temporarily seal the leak until you can have it properly repaired.
- Kitchen Faucet Tightening: Head to the kitchen and check if the faucet is loose. You may tighten it yourself using a wrench and a flashlight.
Regular maintenance can prevent more significant and more costly issues down the line.
When Do I Call A Professional?
While removing and cleaning a bathroom sink drain is a relatively simple task, there are certain situations where it’s best to call in a professional plumber:
- If you encounter a significant clog that seems impossible to dislodge with the tools you have on hand.
- If you notice signs of serious plumbing issues, such as water leaks or damaged pipes that require replacement.
- If you have physical limitations or discomfort working in confined spaces under the sink.
Hiring a licensed and experienced plumber may cost more upfront, but it can save you from potential headaches and costly mistakes in the long run.
Read More Posts
How To Fix A Leaky Bathroom Faucet: A Comprehensive Guide For UK/USA Homeowners
How To Paint Bathroom Cabinets: A Complete Guide For Transforming Your Space
FAQs
How do you remove a bathroom sink drain?
Loosen the retaining nut beneath the sink with a wrench and pull out the drain assembly.
What do you do if the bathroom sink drain is stuck?
Apply penetrating oil to the retaining nut, wait, and then use a wrench to loosen it.
How to unscrew the drain cover in a bathroom sink?
Remove the screws securing the cover with a screwdriver, then lift it off carefully.
How do you remove a pop-up sink plug?
Unscrew the retaining nut on the pivot rod beneath the sink, then lift the pop-up plug.
Conclusion
Regularly cleaning and maintaining your bathroom sink drain is essential to home ownership. Not only does it prevent unpleasant odors and clogs, but it also helps extend the lifespan of your plumbing system. Following the steps outlined in this guide, you can confidently tackle this DIY project and take pride in your handiwork.
Remember, prevention is critical, so make it a habit to clean your sink drain periodically to avoid bigger issues down the road. With the right tools and a little elbow grease, you’ll have a fresh, free-flowing sink in no time.