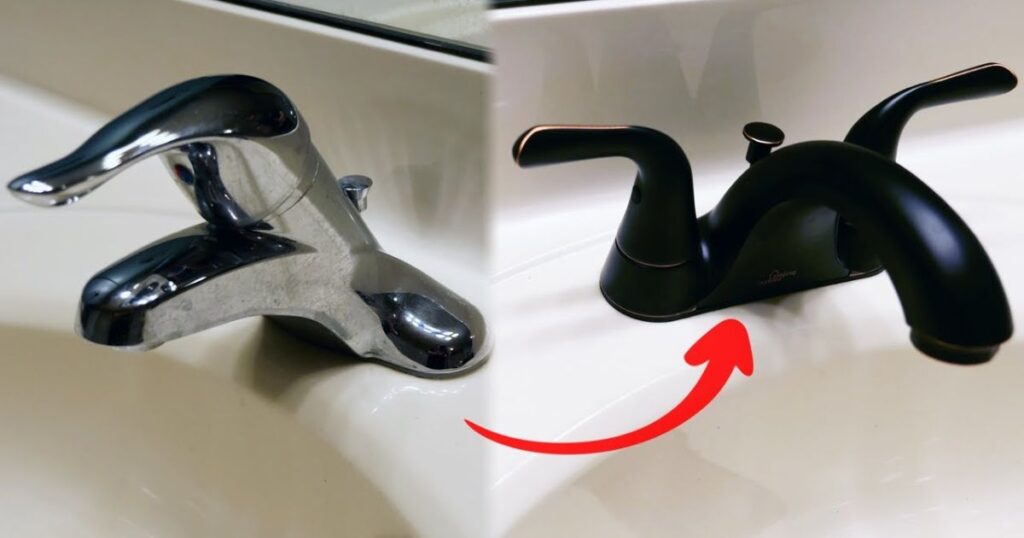
Are you tired of dealing with a leaky, outdated bathroom faucet? Or you’re planning a bathroom renovation and want to refresh the space with a sleek, new fixture. Well, you’re in luck! Replacing a bathroom faucet is a relatively straightforward DIY project that can instantly upgrade the look and functionality of your sink area.
In this step-by-step guide, we’ll walk you through the entire process, from identifying the type of faucet you have to testing the new one for leaks. Say goodbye to that dripping eyesore and hello to a shiny, efficient faucet that’ll make your morning routine a breeze. Let’s get started!
Before You Replace a Bathroom Faucet
Before diving into the replacement process, it’s crucial to determine the type of faucet designed for your bathroom sink. You see, bathroom faucets come in three main configurations: single hole, center set (or centers), and widespread (or split set).
As the name suggests, a single-hole faucet is designed to operate through a single hole in the sink. These are common for single-handle bathroom faucets. On the other hand, a center-set faucet is made for sinks with three holes spaced four inches or less apart. It features a cover plate connecting the pieces on the sink.
Widespread faucets, however, are engineered for sinks with holes six inches or more apart. These appear as three separate pieces: the faucet and two handles.
Once you’ve identified your faucet type, it’s time to prepare the work area. First, locate the shut-off valves under the sink and turn them clockwise to stop the water supply. Then, open the faucet to release any remaining pressure in the lines. Remember to have a bucket or basin handy to catch any water that may spill during the replacement process.
- Tools Checklist:
- Adjustable wrench or basin wrench
- Bucket or basin
- Plumber’s tape
- Silicone sealant or bathroom caulk
- Screwdrivers (flathead and Phillips)
- Pliers
- Rags or paper towels
- All-purpose cleaner or rubbing alcohol
- Faucet Replacement Cost: A new bathroom faucet can range from $50 to $500 or more, depending on the brand, style, and features you choose. If hiring a professional plumber, expect to pay an additional $150 to $300 for labor and materials.
- Watch a Video Tutorial: Sometimes, following along with a visual guide is easier. Check out this helpful video tutorial on replacing a bathroom faucet from start to finish.
- Hire a Professional: If you’re uncomfortable tackling this DIY project or encountering any issues, hire a licensed plumber. They have the expertise and tools to ensure the job is done correctly and safely.
- Case Study: John, a homeowner in San Francisco, decided to replace his outdated bathroom faucet with a sleek, modern fixture. He followed this guide and completed the project in under two hours. “The step-by-step instructions made it so easy,” he said. “I’m thrilled with my bathroom sink’s new look and improved functionality.”
Remember, replacing a bathroom faucet is a great way to update the look and functionality of your bathroom without breaking the bank. With patience and the right tools, you can achieve professional-looking results and enjoy a brand-new faucet for years.
How to Remove a Bathroom Faucet
With the prep work done, you can now tackle removing the old faucet. Here’s how:
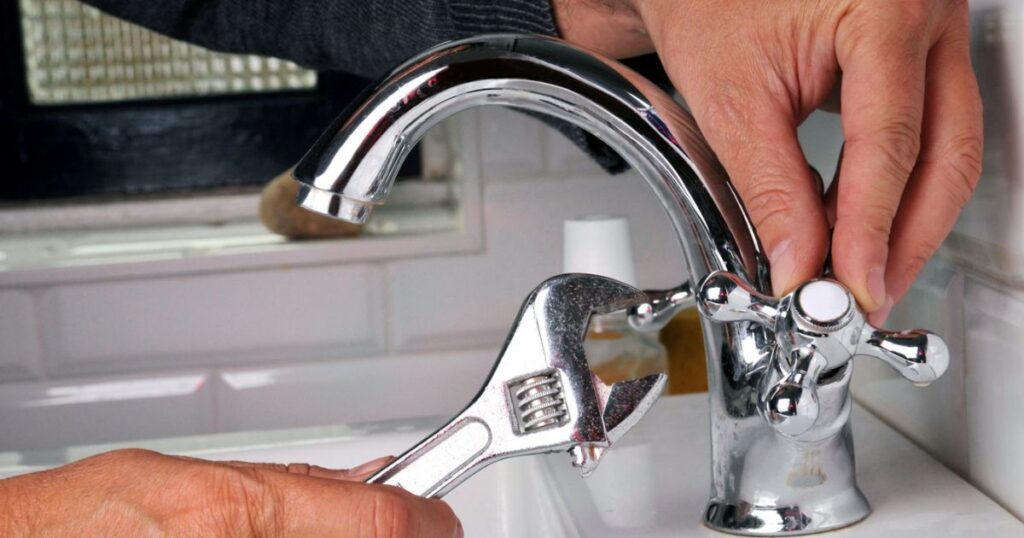
- Disconnect the hot and cold water supply lines from the faucet. You may need an adjustable or basin wrench for this step, especially if the nuts are difficult to reach.
- Locate and unscrew the mounting nuts that secure the faucet to the sink. These are typically found underneath the sink basin.
- Detach the faucet’s lift rod from the drain assembly. This rod is responsible for opening and closing the drain stopper.
- Gently pull the entire faucet assembly upwards until it clears the sinkholes. You may need to wiggle it if the base is adhered to the sink.
- Finally, clean the top of the sink around the faucet holes using rubbing alcohol or an all-purpose cleaner. This will ensure a proper seal when installing the new faucet.
How to Replace a Bathroom Sink Drain
While you’re replacing the faucet, it’s also an excellent opportunity to swap out the old sink drain. Many faucet replacement kits conveniently include a new drain assembly. Here’s how to tackle this task:
- Start by detaching the P-trap, that curved pipe under the sink basin. Use an adjustable wrench to loosen the slip nut that connects it to the drain tailpiece. Place your bucket underneath to catch any water.
- Next, unscrew the sink drain flange from the tailpiece below the sink.
- Prepare the new drain tailpiece by attaching the nut and gasket according to the manufacturer’s instructions.
- Apply a thin layer of silicone sealant to the underside of the new drain flange.
- Position the flange over the drain hole in the sink and secure the tailpiece to it from below.
- Tighten the tailpiece nut and gasket, starting by hand and finishing with an adjustable wrench for a snug fit.
- Finally, reattach the tailpiece to the P-trap and tighten the connection using your wrench. For plastic pipes, skip the plumber’s putty. Instead, wrap one or two plumber tape layers around the threads for a leak-proof seal.
How to Install a Bathroom Faucet
With the old faucet and drain out of the way, it’s time to install the shiny new fixture! Here’s how to do it like a pro:
- Carefully remove the new faucet from its packaging, not scratching or damaging any components.
- Place the rubber or plastic gasket(s) provided in the kit between the faucet base and the top of the sink holes. These will create a watertight seal.
- Position the new faucet in the correct orientation, ensuring that the hot and cold water valves align with their respective holes.
- Apply a thin bead of bathroom caulk around the edge of the faucet base for added protection against leaks.
- From underneath the sink, place the washers over the mounting bolts or nuts and hand-tighten them first.
- Use an adjustable wrench or pliers to securely tighten the mounting hardware, being careful not to overtighten.
- Reattach the lift rod to the new drain tailpiece so the stopper mechanism functions properly.
- Finally, reconnect the hot and cold water supply lines to the new faucet valves.
Test the New Faucet

After all that hard work, it’s time for the moment of truth – testing your newly installed faucet! Here’s what to do:
- Turn the water supply back on by opening the shut-off valves under the sink.
- Slowly turn on the faucet, allowing hot and cold water to flow.
- Carefully inspect all connections above and below the sink, checking for any signs of leaks.
- Let the water run for a few minutes to flush out debris in the lines.
If everything looks good and leak-free, congratulations! You’ve just successfully replaced your bathroom faucet like a pro. Pat yourself on the back!
Read More Posts
Can I Lose My House Due To At-Fault Car Accident?
How Long Is House Inspection Good For
FAQs
Can I replace a bathroom faucet myself?
Yes, you can replace a bathroom faucet yourself.
Do I need a plumber to install a bathroom faucet?
No, you don’t necessarily need a plumber to install a bathroom faucet.
Can you replace a faucet by yourself?
Yes, I can replace a faucet by myself.
Do you need to shut off the water to change the bathroom faucet?
You generally need to shut off the water to change a bathroom faucet.
Conclusion
There you have it – a comprehensive guide on how to replace a bathroom faucet. By following these step-by-step instructions, you’ve saved yourself the cost of hiring a plumber and gained a valuable DIY skill.
Replacing a faucet is a relatively simple task that can freshen up your bathroom’s look and functionality. With the right tools, patience, and this guide, you’ll enjoy your new, leak-free faucet in no time.
So, what are you waiting for? Gather your supplies, roll up your sleeves, and tackle that outdated faucet today! Your morning routine (and water bill) will thank you.